

Why Clean Brushes Are Essential for Clear, Healthy Skin
Let me guess—you’ve got a stellar skincare routine, you’re diligent about removing your makeup, and you’re still breaking out. Here’s a question: when was the last time you washed your makeup brushes?
If you just squirmed a little, you’re not alone. Most of us don’t think twice about brush hygiene until someone points out that those fluffy tools we swipe across our faces daily are basically bacteria hotels. The truth? Your unwashed brushes are accumulating oil, dead skin cells, old makeup, and yes, plenty of acne-causing bacteria. The good news is that proper makeup brush cleaning techniques are ridiculously simple, and once you get into the habit, you’ll wonder why you ever skipped it. Clean brushes mean better skin, smoother makeup application, and brushes that actually last. Let’s dive into how often to clean makeup brushes and exactly how to do it right.
1. Why Dirty Makeup Brushes Cause Skin Problems
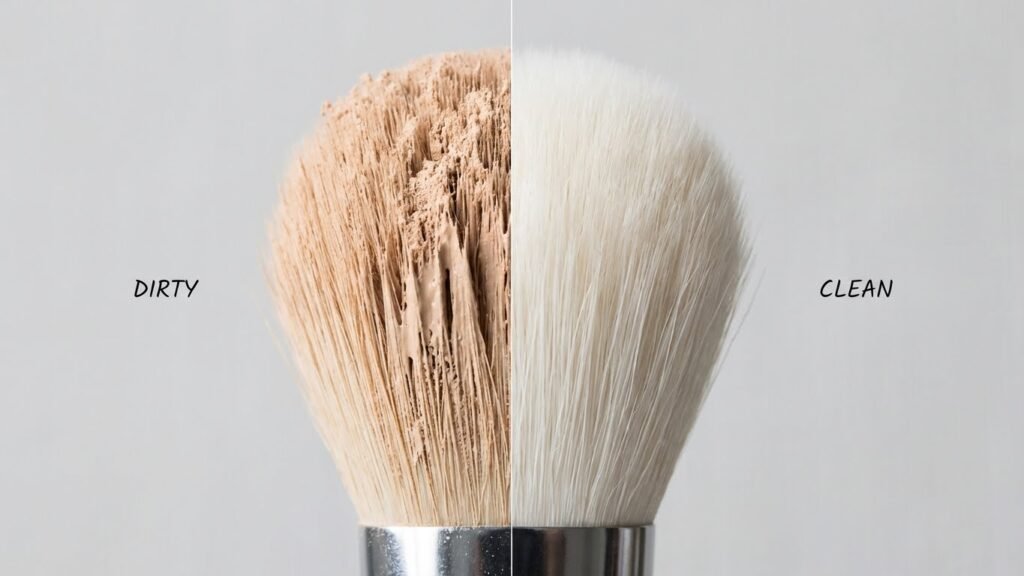
Think of your makeup brushes as sponges. Every time you use them, they’re soaking up foundation, oils from your skin, dead skin cells, and environmental debris. Then you put them away, and all that gunk just sits there, creating a breeding ground for bacteria.
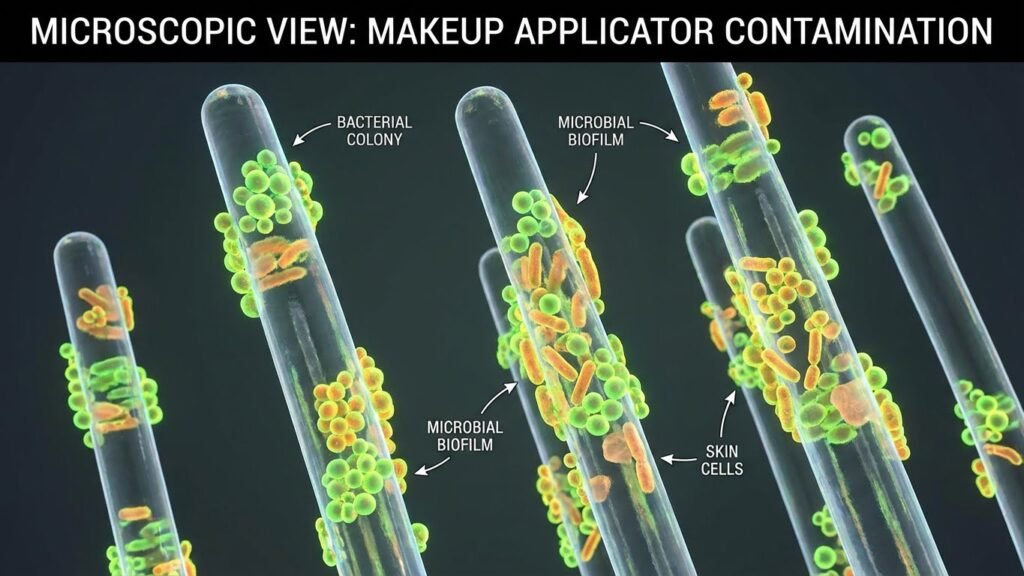
Studies show that makeup brushes can harbor harmful bacteria like Staphylococcus and E. coli after just a few uses. When you apply makeup with dirty brushes, you’re essentially reintroducing all that bacteria back onto your skin—clogging pores, triggering inflammation, and causing those frustrating breakouts that seemingly come out of nowhere.
Beyond acne, dirty brushes can lead to skin irritation, rashes, and even eye infections (especially with unwashed eye shadow brushes). Plus, product buildup makes your brushes less effective, resulting in patchy, uneven application. Brush hygiene isn’t just about skincare—it’s about getting your money’s worth from both your makeup and your tools.
2. How Often Should You Clean Your Makeup Brushes?
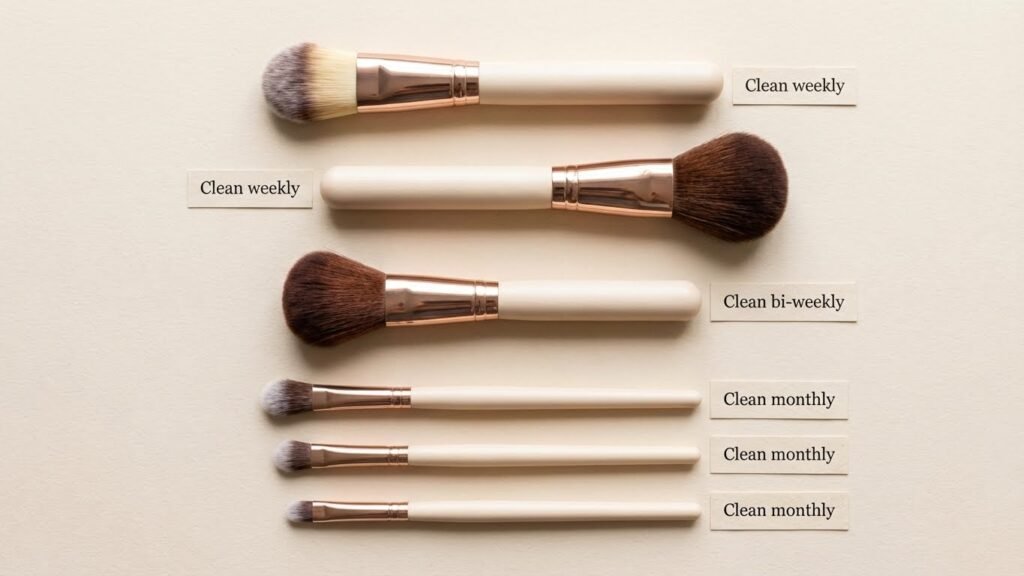
This is the million-dollar question, and the answer depends on what you’re using. Not all brushes need the same cleaning schedule, and understanding the difference can save you time while keeping your skin protected.
Here’s your quick reference guide:
| Brush Type | Cleaning Frequency | Why |
|---|---|---|
|
Foundation & concealer brushes
|
1–2× per week
|
Liquid products trap bacteria quickly
|
|
Powder & blush brushes
|
Every 1–2 weeks
|
Powder products are less hospitable to bacteria
|
|
Eye shadow brushes
|
Weekly
|
Eye area is sensitive; prevent irritation and infection
|
|
Beauty sponges
|
After every use
|
Damp sponges are bacterial magnets
|
If you’re dealing with acne or sensitive skin, err on the side of cleaning more frequently. And if you’re a professional makeup artist? Daily cleaning (or at least spot-cleaning between clients) is non-negotiable.
Bottom line: how often to clean makeup brushes isn’t one-size-fits-all, but consistent cleaning is your best defense against skin issues.
3. The Best Makeup Brush Cleaning Techniques (Step-by-Step)
Alright, let’s get practical. Here are the most effective makeup brush cleaning techniques you can start using today.
The Standard Soap-and-Water Method (Most Common)
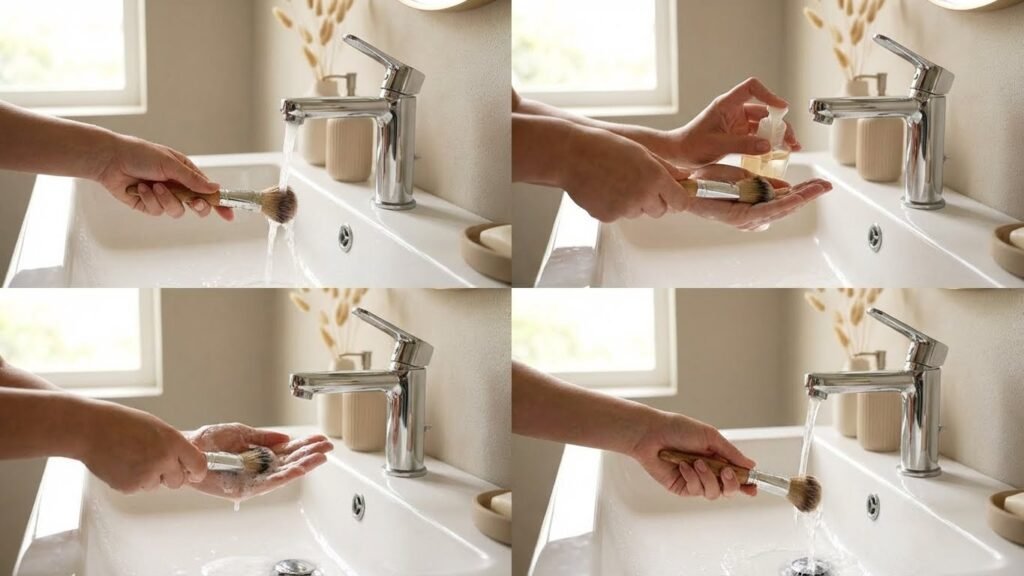
This is your go-to for thorough, deep cleaning:
- Rinse the bristles under lukewarm water, pointing them downward (never let water seep into the ferrule—that’s the metal part—or it’ll loosen the glue).
- Lather a small amount of gentle soap or brush cleanser in your palm or on a cleaning mat.
- Swirl the brush gently in circular motions to work the cleanser through the bristles.
- Rinse thoroughly under running water until it runs clear.
- Reshape the bristles gently with your fingers.
- Dry flat on a clean towel or hanging upside down—never upright.
Pro tip: Always angle bristles downward during washing and rinsing to prevent water damage.
Using a Brush Cleaning Mat (Deep Cleaning)
Textured silicone mats have different ridges and patterns designed to work cleanser deep into bristles:
- Wet your brush and apply cleanser.
- Swirl the brush on the textured surface—different zones for different brush sizes.
- Rinse thoroughly and reshape.
This method is especially effective for removing stubborn cream products like foundation or concealer.
Quick-Clean Method (For Between Uses)
Don’t have time for a full wash? Fast-drying brush sprays are lifesavers:
- Spray the bristles lightly.
- Wipe on a clean towel or tissue.
- Let air-dry for a few minutes.
This works great for powder brushes between deep cleans, but it’s not a replacement for proper washing.
4. Best Brush Cleaners — What to Look For (and Top Options)
Not all cleansers are created equal. Here’s what makes a great best brush cleaner:
- Gentle surfactants that remove makeup without stripping natural or synthetic bristles
- Antibacterial properties to kill germs
- Fast-drying formula (for daily users)
- Conditioning agents to keep bristles soft
Types of Brush Cleaners:
Liquid brush soaps — The gold standard. Gentle, effective, and great for deep cleaning. Look for pH-balanced formulas that won’t damage bristles
- recommended : EcoTools Makeup Brush + Sponge Shampoo Cleanser.
Solid brush cleansers — Compact and travel-friendly. You swirl wet brushes directly on the solid soap.
- recommended : DUcare Makeup Brush Cleaner.
Fast-drying sprays — Perfect for quick spot-cleans or professional settings. Most dry in under a minute.
- recommended : EcoTools Daily Makeup Brush Cleanser Spray.
Shampoo-based options — Baby shampoo or gentle clarifying shampoo works in a pinch. Budget-friendly and surprisingly effective for synthetic brushes.
Whatever you choose, avoid harsh sulfates or alcohol-heavy formulas that can damage natural bristles or dry out synthetic ones.
5. DIY Makeup Brush Cleaners — Safe, Effective, and Budget-Friendly
Prefer the DIY route? You can create effective DIY makeup brush cleaner solutions with ingredients you already have.
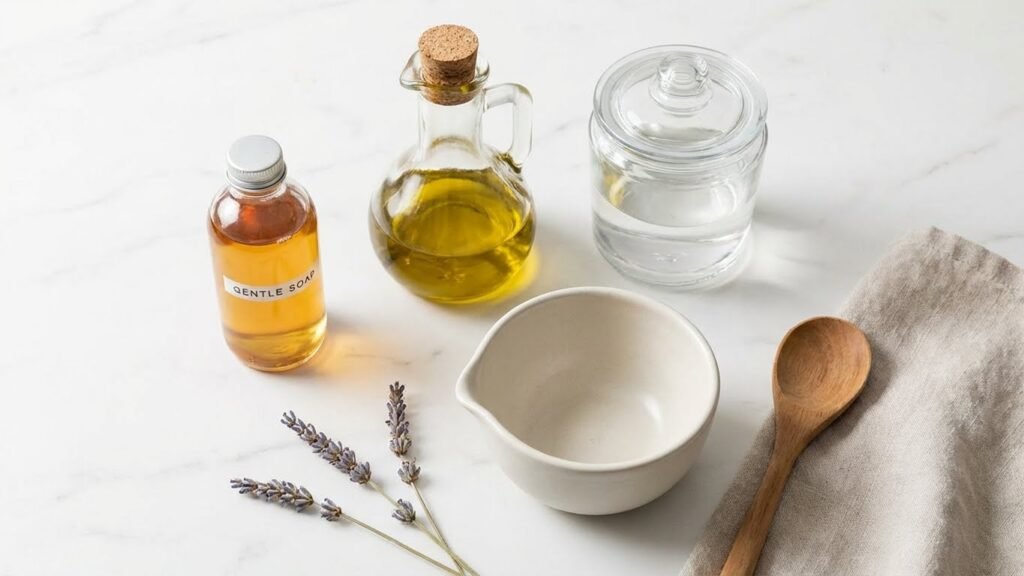
Gentle Soap Mix (Everyday Cleaning)
- 2 parts warm water
- 1 part gentle dish soap (like Dawn) or castile soap
Mix in a shallow bowl, swirl brushes, rinse thoroughly. Simple, cheap, effective.
Deep-Clean Oil Method (For Heavy Buildup)
- 2 parts gentle soap
- 1 part olive oil or coconut oil
The oil breaks down stubborn makeup (especially waterproof formulas), while the soap cleanses. Massage into bristles, rinse well.
Natural Vinegar Rinse (Optional Disinfecting Step)
- 1 part white vinegar
- 2 parts water
Use as a final rinse for extra antibacterial power. Caution: Don’t use undiluted vinegar—it can damage natural bristles. And skip this step if you have sensitive skin or natural hair brushes.
A word of warning: Avoid rubbing alcohol or harsh household cleaners. They’ll dry out bristles, cause shedding, and can irritate your skin.
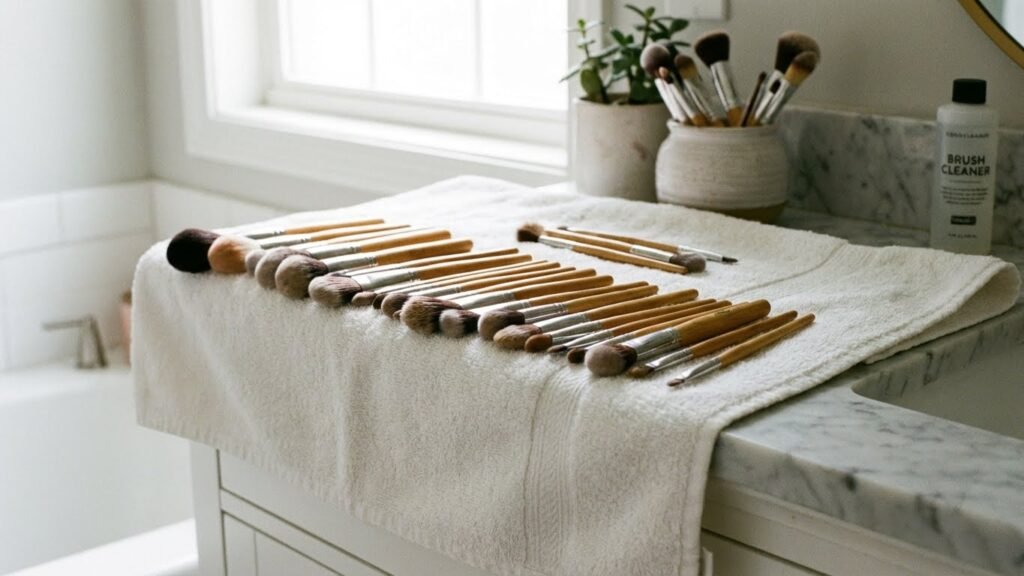
6. How to Dry Your Makeup Brushes Properly
Here’s where most people mess up. How you dry your brushes is just as important as how you clean them.
The Right Way:
- Reshape bristles with your fingers immediately after washing.
- Lay flat on a clean towel with bristles hanging slightly off the edge of a counter (for air circulation).
- Or hang upside down using a brush drying rack or hair ties.
- Let air-dry completely (usually 6-8 hours for dense brushes).
What NOT to Do:
- Don’t dry brushes upright — water will seep into the ferrule and loosen the glue.
- Don’t use a blow dryer — heat damages bristles and glue.
- Don’t leave them on a damp towel — they’ll mildew.
- Don’t use them while damp — hello, bacteria paradise.
Patience here pays off. Properly dried brushes maintain their shape and last years longer.
7. How to Maintain Your Brushes Between Washes
Think of these as the daily habits that keep your brush hygiene game strong:
Wipe after each use — A quick swipe on a clean microfiber towel removes surface makeup and extends time between deep cleans.
Store brushes properly — Keep them in open-air containers (like a brush cup) rather than closed drawers where bacteria thrive. Avoid laying them flat in makeup bags.
Avoid humid bathrooms — Moisture encourages bacterial growth. Store brushes in a bedroom or vanity instead.
Replace when necessary — Brushes that shed excessively, have bent bristles, or show visible wear should be replaced. Quality brushes last 1-3 years with proper care.
Spot-clean between uses — For frequently used brushes, keep a fast-drying spray handy for quick refreshes.
These small habits make a massive difference in how often you need to deep-clean and how long your brushes last.
8. Brush Cleaning Mistakes to Avoid
Let’s talk about what not to do—because these common mistakes can damage your brushes or sabotage your skin:
- Soaking brushes in water — This loosens the glue in the ferrule, causing bristles to fall out.
- Using hot water — Heat damages both natural and synthetic bristles. Stick to lukewarm.
- Drying brushes upright — We’ve covered this, but it bears repeating: water will ruin the brush handle and loosen bristles.
- Using alcohol or harsh cleaners on natural bristles — These strip natural oils, leaving bristles brittle and scratchy.
- Washing too infrequently — If you’re only washing every few months, your skin (and makeup application) is suffering.
- Aggressive scrubbing — Be gentle. Rough handling damages bristle structure and shortens brush life.
Avoid these pitfalls, and your brushes will reward you with years of flawless performance.
9. Expert Tips for Longer-Lasting Brushes (and Better Makeup Application)
Want to level up? Here are pro secrets that extend brush life and improve your makeup game:
Use brush guards while drying — These mesh sleeves maintain brush shape as they dry, especially helpful for fluffy powder brushes.
Rotate your brushes — If you have multiple foundation brushes, alternate them to reduce wear on any single brush.
Sort by product type — Keep cream/liquid brushes separate from powder brushes to avoid cross-contamination and buildup.
Clean sponges more often than brushes — Damp beauty sponges are bacterial magnets. Wash after every use or every other use at minimum.
Replace brush heads annually — If you’re a heavy user or professional, even with excellent care, brushes lose effectiveness over time.
Invest in quality — Higher-quality brushes with better construction hold up to frequent washing much better than cheap alternatives.
Small upgrades, huge impact.
FAQs About Cleaning and Maintaining Makeup Brushes
What’s the fastest way to clean brushes?
Fast-drying brush sprays are your best bet—spray, wipe on a towel, and they’re ready in 1-2 minutes. For deeper cleaning, the soap-and-water method takes about 5 minutes per brush.
Can I use shampoo to clean makeup brushes?
Absolutely. Baby shampoo or gentle clarifying shampoo works well, especially for synthetic brushes. Just avoid heavy conditioners that leave residue.
How do I know when it’s time to replace a brush?
If bristles are shedding excessively, losing shape, feeling scratchy, or no longer apply makeup smoothly, it’s time for a replacement.
Can dirty brushes really cause acne?
Yes. Dirty brushes harbor bacteria, oil, and dead skin cells that clog pores and trigger breakouts. Regular cleaning is essential for clear skin.
How long should brushes take to dry?
Dense brushes (like foundation or kabuki brushes) take 6-8 hours. Lighter brushes (like eye shadow brushes) dry in 3-4 hours. Always let them dry completely before use.
Conclusion — Clean Brushes, Better Skin, Better Makeup
Here’s the bottom line: makeup brush cleaning techniques aren’t complicated, time-consuming, or optional. They’re one of the easiest, most effective ways to upgrade your skin health and makeup application in one simple habit.
Clean brushes mean fewer breakouts, smoother foundation, better blending, and tools that last for years. Whether you’re using a DIY makeup brush cleaner, a professional formula, or the best brush cleaner from your favorite brand, consistency is what matters most.
Start small—pick one day a week as “brush cleaning day” and build from there. Your skin, your makeup, and your future self will thank you.
Ready to upgrade your routine? Check out our favorite brush cleaning tools and time-saving products to make this habit even easier. Your clearest skin is just a wash away.