

Why the Right Foundation Shade Matters
We’ve all been there—standing in the makeup aisle, swatching foundation shades on the back of our hands, only to get home and discover that perfect-looking shade has transformed us into either a ghost or given us an unfortunate orange tint. Or worse, that dreaded mask-like finish that screams “I’m wearing makeup!” from across the room.
Here’s the truth: finding the right foundation shade isn’t about luck—it’s about strategy. A perfectly matched foundation is literally the difference between looking flawless and looking fake. It’s your makeup base, the canvas that everything else builds upon, and when you get it right, it doesn’t just cover imperfections—it enhances your natural beauty.
The good news? This guide will simplify the entire process of finding your ideal shade match. We’re going to break down everything from understanding your undertones to testing techniques that actually work, plus insider tips for every skin type and budget. Whether you’re fair with cool undertones or deep with warm golden notes, we’ve got you covered.
Because here’s what I’ve learned after years in the beauty industry: the right foundation doesn’t hide your skin—it makes your skin look like the absolute best version of itself.
Step 1: Understand Your Skin's Undertone
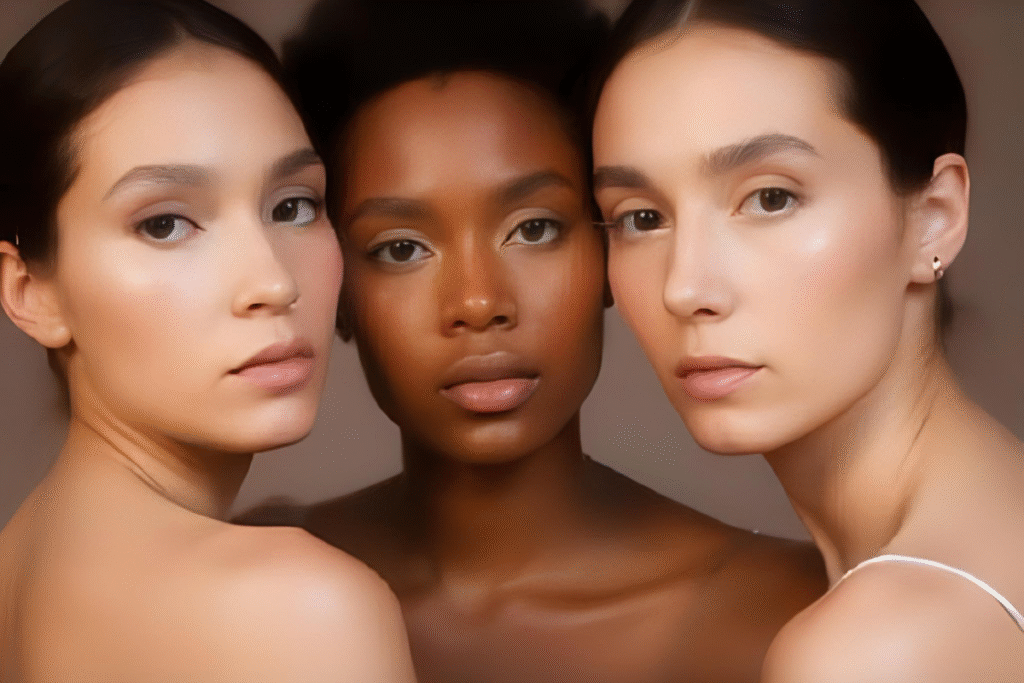
Before we dive into shade selection, let’s talk about the hidden key to a natural-looking foundation match: your undertones. Think of undertones as the subtle color that lives beneath the surface of your skin—it’s what makes the difference between a foundation that looks seamless and one that looks like you’re wearing a mask.
The Three Main Undertone Categories
Cool Undertones: Your skin has hints of pink, red, or blue beneath the surface. You might notice that you look amazing in jewel tones like sapphire blue or emerald green.
Warm Undertones: Your skin has golden, yellow, or peachy notes underneath. Earth tones and warm colors like coral and golden yellow probably make you glow.
Neutral Undertones: You’re the lucky one—you have a balanced mix of both warm and cool tones, which means you can wear a wider range of foundation shades successfully.
Simple Tests to Identify Your Undertones
The Vein Test: Look at the veins on your wrist in natural light. Blue or purple veins typically indicate cool undertones, while green veins suggest warm undertones. If you see both colors equally, you likely have neutral undertones.
The White vs. Cream Test: Hold up a bright white piece of paper next to your face, then try cream or off-white. If bright white makes you look more vibrant, you’re likely cool-toned. If cream or off-white is more flattering, you’re probably warm-toned.
The Jewelry Test: Do you look better in silver jewelry or gold? Silver typically complements cool undertones, while gold enhances warm undertones. Love both equally? Hello, neutral undertones!
| Undertone | Vein Color | Best Jewelry | Flattering Colors |
|---|---|---|---|
|
Cool
|
Blue/Purple
|
Silver, Platinum
|
Jewel tones, True reds
|
|
Warm
|
Green |
Gold, Brass
|
Earth tones, Coral, Peach
|
|
Neutral
|
Blue & Green
|
Both Silver & Gold
|
Most colors
|
Pro Tip: Yes, you absolutely can be cool-toned and tan! Having a deep skin tone doesn’t automatically mean you have warm undertones. Many people with rich, dark skin have cool pink or red undertones that look stunning in silver jewelry and jewel-toned colors.
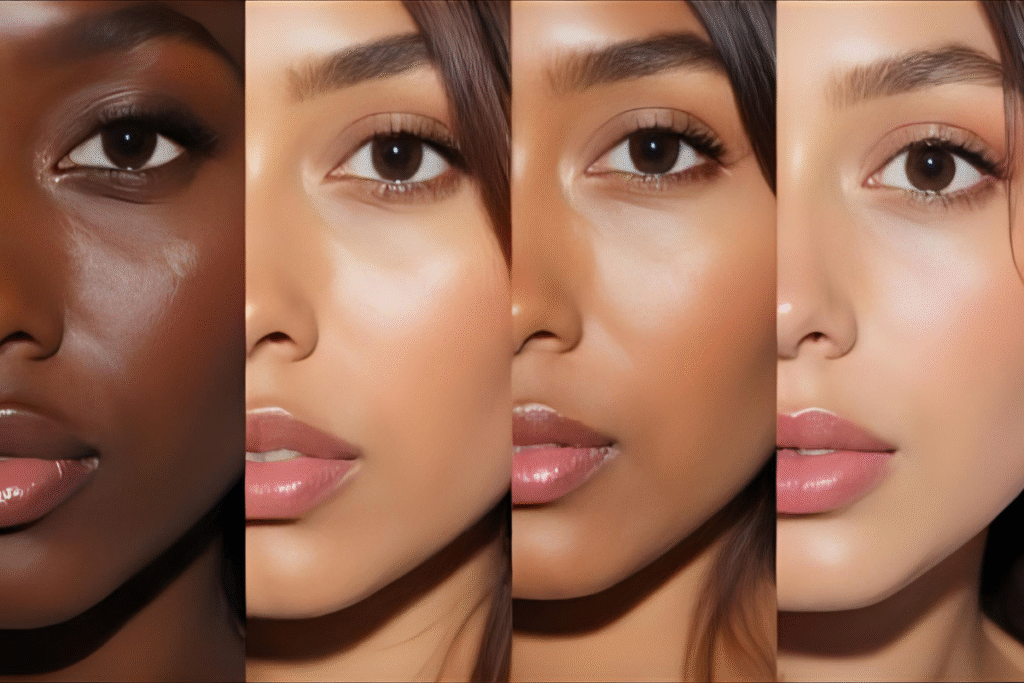
Step 2: Identify Your Skin Tone Level (Fair to Deep)
Now that you understand your undertones, it’s time to determine where you fall on the skin tone spectrum. This isn’t about categorizing yourself—it’s about empowering yourself with the knowledge to walk into any store and know exactly which shade range to explore.
The Skin Tone Spectrum
Fair: You burn easily and rarely tan. You might have trouble finding shades light enough in some ranges.
Light: You burn before you tan, but you can achieve a light golden color with gradual sun exposure.
Medium: You tan relatively easily and rarely burn. You might notice your skin changes noticeably between seasons.
Tan/Olive: You tan easily and have natural golden or olive tones year-round.
Deep: You have rich, beautiful melanin that rarely burns and may have golden, red, or cool undertones.
Rich: You have the deepest skin tones with gorgeous undertones that can range from golden to mahogany to cool espresso.
Seasonal Considerations
Here’s something many people don’t consider: your skin tone can shift with the seasons. If you’re someone who tans easily, you might need two different foundation shades—one for your winter skin and one for summer. There’s nothing wrong with having multiple shades; in fact, it’s smart beauty strategy.
Many makeup artists recommend mixing two shades during transitional seasons like spring and fall when your skin tone is somewhere in between your lightest and darkest.
Pro Tip: Don’t feel pressured to fit perfectly into one category. Skin is beautifully complex, and the goal is finding what works for your unique combination of tone and undertone.

Step 3: Match Formula to Skin Type
Here’s where many people go wrong: they focus solely on color and forget that your skin’s needs should influence both the formula and how that color looks on you. A foundation that’s the perfect shade but the wrong formula for your skin type will still look off.
Foundation Formulas by Skin Type
For Oily Skin:
- Matte or oil-control liquid foundations are your best friend
- Look for words like “oil-free,” “mattifying,” or “long-wearing”
- Powder foundations can also work beautifully for touch-ups
- Pro Tip: Use a mattifying primer underneath to extend wear time
For Dry Skin:
- Hydrating or serum-based foundations will give you that healthy glow
- Look for ingredients like hyaluronic acid, glycerin, or vitamins
- Avoid anything labeled “matte” as it can emphasize dry patches
- Pro Tip: Mix a drop of facial oil with your foundation for extra hydration
For Mature Skin:
- Lightweight, luminous formulas that won’t settle into fine lines
- Avoid heavy, full-coverage formulas that can look cakey
- Look for light-reflecting particles that give a natural glow
- Pro Tip: Use a hydrating primer to create a smooth base
For Combination Skin:
- Medium-coverage liquid foundations that balance both oily and dry areas
- You might need different application techniques for different zones
- Consider using a mattifying powder only in your T-zone
Liquid vs. Powder vs. Stick: What's the Difference?
Liquid Foundation: Most versatile, works for most skin types, buildable coverage Powder Foundation: Great for oily skin, quick application, good for touch-ups Stick Foundation: Portable, full coverage, great for spot concealing
The key is matching the formula to your lifestyle and skin needs, not just following trends.

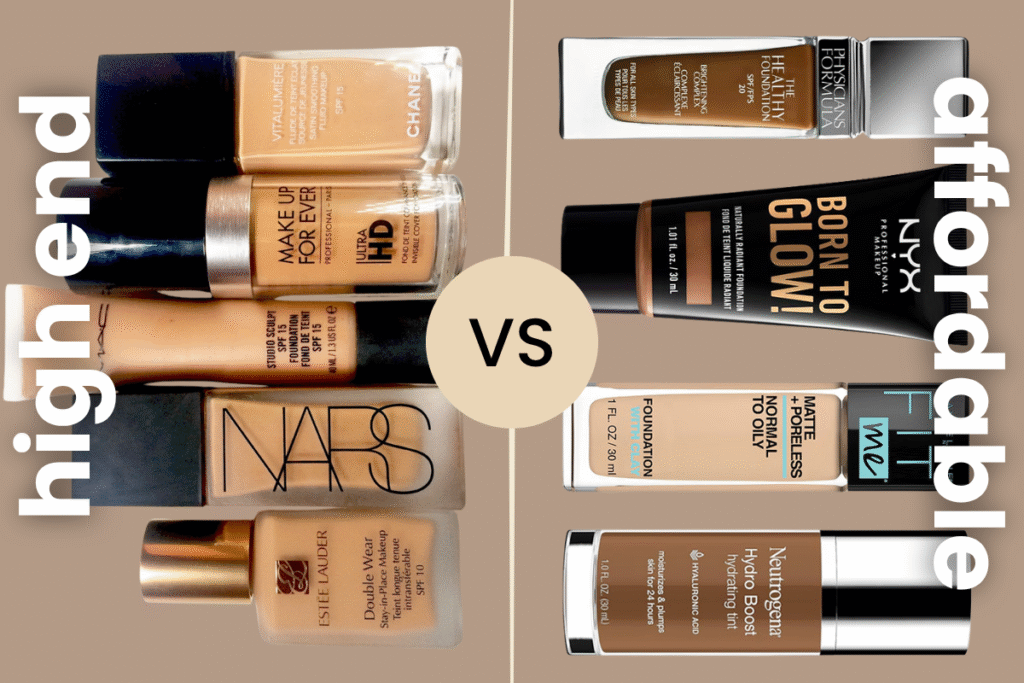
Drugstore vs. High-End: Can You Still Find Your Perfect Match?
Let me bust a major myth right now: you don’t need to spend $50+ to find your perfect foundation match. While high-end brands certainly have their merits, drugstore brands have absolutely stepped up their game in recent years, particularly when it comes to shade range and formulation.
The Great Equalizer: Shade Range and Formulation
What matters more than price tag:
- Comprehensive shade range (looking at you, Fenty Beauty, for changing the game)
- Quality formulation that works with your skin type
- Undertone accuracy in their color matching
- Longevity and wear throughout the day
Drugstore Champions
L’Oréal True Match: 45 shades with clear undertone labeling (C for cool, W for warm, N for neutral) Maybelline Fit Me: Excellent for oily skin with great shade diversity NYX Can’t Stop Won’t Stop: Full coverage with impressive staying power Revlon ColorStay: Long-wearing formula available for different skin types
High-End Worth the Splurge
Sometimes the investment is worth it for:
- Custom color matching services (hello, Sephora Color IQ)
- Unique formulations you can’t find at the drugstore
- Luxury experience and customer service
- Extensive shade testing before purchase
Digital Shade Finder Tools
Many retailers now offer AI-powered shade matching:
- Sephora’s Color IQ system
- Ulta’s GLAMlab virtual try-on
- Brand-specific apps like L’Oréal’s Makeup Genius
The bottom line? Great foundation exists at every price point. It’s about finding the right combination of shade, undertone, and formula for your unique needs.
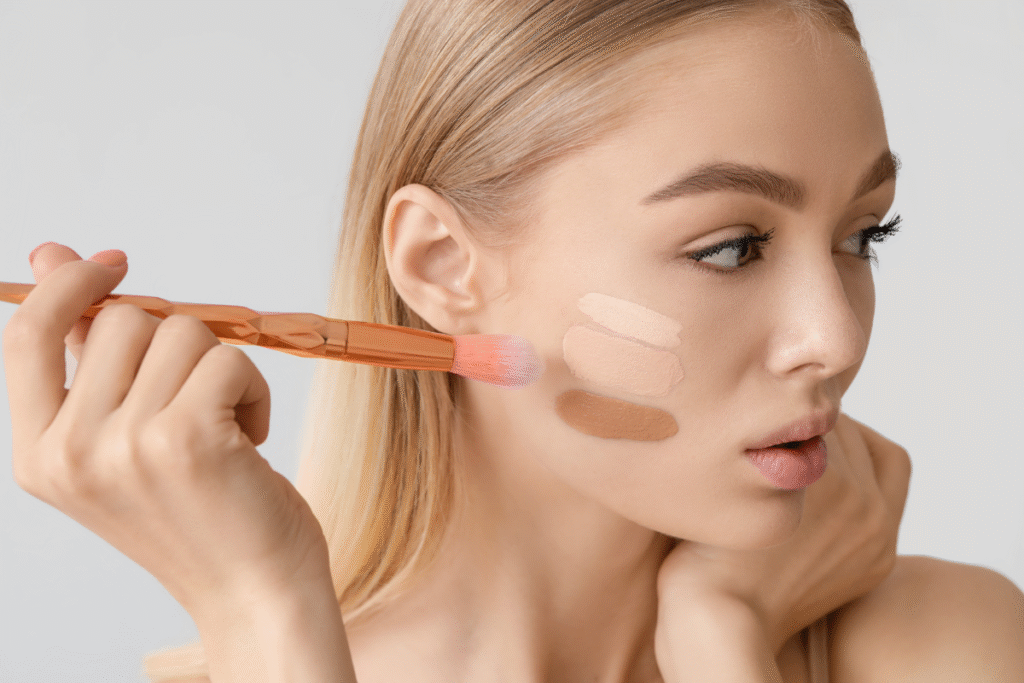
How to Test Foundation the Right Way
This is where the magic happens—or where everything goes wrong. The way you test foundation can make or break your shade-matching success. Forget everything you think you know about swatching on your hand (spoiler alert: it’s almost useless).
The Golden Rules of Foundation Testing
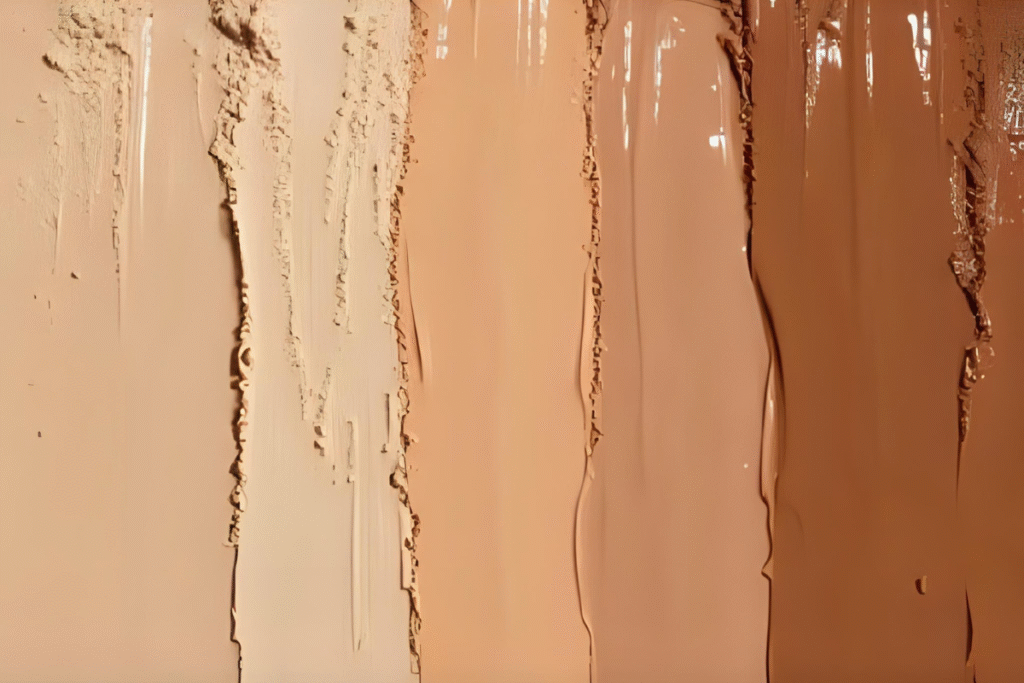
Rule #1: Test on Your Jawline, Not Your Hand Your hand is a completely different color than your face. Instead, swatch three potential shades along your jawline where your face meets your neck. The right shade will virtually disappear.
Rule #2: Wait for the Oxidation This is crucial: wait 5-10 minutes after applying before making your decision. Many foundations oxidize (change color) when they react with your skin’s natural oils and pH. What looks perfect initially might turn orange or ashy after a few minutes.
Rule #3: Natural Light is Everything Department store lighting is notoriously deceptive. Step outside or near a window to see how your potential shade looks in natural light. If you can’t get outside, use your phone’s flashlight as a backup.
Rule #4: The Three-Shade Strategy Don’t just test one shade—test three: one you think is perfect, one slightly lighter, and one slightly deeper. Often, the perfect match is somewhere in between what you initially thought.
Blending Techniques for Testing
Here’s an insider secret: you can create a custom shade by mixing two foundations. If one shade is slightly too light and another is slightly too dark, blend them together on your jawline. Many makeup artists do this to achieve the perfect match for their clients.
Digital Testing Tools
Smartphone Apps:
• YouCam Makeup for virtual try-ons
• Perfect365 for shade matching
• Brand-specific apps with AR technology
In-Store Technology:
• Sephora’s Color IQ scanning device
• MAC’s digital color-matching system
• Ulta’s virtual try-on mirrors
Pro Tip: Even with digital tools, always confirm with actual product testing. Technology is getting better, but nothing beats how foundation actually looks and feels on your skin.
Common Foundation Matching Mistakes (and How to Avoid Them)
Let’s talk about the foundation matching mistakes that trip up even beauty enthusiasts. I’ve seen these errors countless times, and they’re so easily avoidable once you know what to watch for.
Mistake #1: Choosing Based on Bottle Color Only
The Problem: That gorgeous golden shade in the bottle might look completely different on your skin.
The Fix: Always test the actual formula. Packaging colors can be misleading, and how a foundation interacts with your skin’s undertones is what matters.
Mistake #2: Ignoring Your Undertones
The Problem: You pick the right depth but wrong undertone, resulting in that dreaded “mask” effect.
The Fix: Match both your skin tone level AND your undertones. A medium shade with cool undertones will look terrible on warm-toned skin, even if the depth seems right.
Mistake #3: Testing in Bad Lighting
The Problem: Fluorescent store lighting makes everything look different than real life.
The Fix: Always check your potential shade in natural light before purchasing. Take a hand mirror outside if you have to.
Mistake #4: Not Accounting for Oxidation
The Problem: Your foundation looks perfect when you first apply it, then turns orange or dark after an hour.
The Fix: Wait at least 10 minutes after application to see the true color. Some foundations can continue changing for up to 30 minutes.
Mistake #5: Seasonal Stubbornness
The Problem: Using the same shade year-round when your skin tone clearly changes with the seasons.
The Fix: Embrace having multiple shades. Mix them during transitional periods, or have separate summer and winter foundations.
Mistake #6: Hand-Swatching Only
The Problem: Your hands are usually different colors than your face and neck.
The Fix: Test on your jawline or neck where you’ll actually wear the foundation.
Pro Tip: If you make a mistake and buy the wrong shade, don’t throw it away! You can often mix it with another shade to create your perfect match, or use it as a color corrector.
FAQs: Foundation Matching Questions Answered
What’s the best way to find your foundation shade online?
Start with brand shade-matching tools and read reviews from people with similar skin tones. Look for detailed descriptions of undertones, not just “I’m medium-toned.” Many brands now offer sample sizes or generous return policies for online purchases. When in doubt, order two shades and return the one that doesn’t work.
How do I know if my foundation is too light or too dark?
Too light: Your face looks ashy, washed out, or significantly lighter than your neck and chest. You might also notice it doesn’t blend well at your hairline or jawline.
Too dark: Your face looks muddy, you see obvious lines at your jawline, or your foundation looks unnatural against your neck and hands. If you have to blend foundation down your neck to make it work, it’s too dark.
Should foundation match my face or neck?
Match your neck. Your face and neck should look like one cohesive unit. The goal is seamless blending from your forehead down to your décolletage. If there’s a slight color difference between your face and neck naturally, choose the neck shade and use bronzer to warm up your face if needed.
Can I mix two shades for a custom match?
Absolutely! This is actually a professional technique. Mix a small amount on the back of your hand first to see the resulting color, then apply. You can mix different shades from the same line, or even different formulas if they play well together. Just make sure to mix them each time for consistency.
How often should I change my foundation shade?
Check your shade seasonally. Many people need at least two shades: one for winter and one for summer. If you tan or your skin changes with the seasons, reassess every 3-4 months. Also reconsider your shade if you’ve had significant lifestyle changes (new skincare routine, hormonal changes, age-related skin changes).
What if I’m between two shades?
This is totally normal! You have several options: mix the two shades, buy both and use seasonally, choose the lighter shade and use bronzer to warm up, or choose the slightly deeper shade and use it sheerly for a more natural look.
Conclusion: Your Skin, Only Better
Here’s what I want you to remember: the right foundation doesn’t hide your skin—it enhances it. When you nail the perfect shade match, foundation becomes invisible in the best possible way. It evens out your complexion, gives you confidence, and creates the perfect canvas for the rest of your makeup (or looks amazing on its own).
The perfect foundation match comes down to three key elements: understanding your undertones, knowing your skin tone level, and choosing the right formula for your skin type. Everything else—the testing, the blending, the seasonal adjustments—is just fine-tuning this foundation of knowledge.
Remember, finding your perfect shade might take some trial and error, and that’s completely normal. Even makeup artists sometimes need to mix shades or try different formulas. Your skin is unique, and your foundation should celebrate that uniqueness, not mask it.
Ready to find your perfect match? Start with determining your undertones using our simple tests, then head to your favorite beauty retailer armed with this knowledge. Test smart, be patient with the process, and don’t be afraid to ask for help from beauty advisors.
Your perfect foundation shade is out there—now you have the tools to find it.